


How to Read Soil Test Results and Check Them Against the Site
A soil test is evidence, not a verdict. It measures properties such as pH, phosphorus, exchangeable sodium, electrical conductivity and soil organic carbon. A site survey shows how ground conditions relate to a proposed build. Understanding soil tests and site survey reports means reading both alongside what the site reveals about its structure and drainage.
It’s natural to expect a laboratory result to give a clear answer, but a number only has meaning in context. The same result can call for a different response depending on soil type, sampling location and what you observe on the ground.
This guide explains what common results can tell you, how to compare them with field observations and why representative sampling matters. You’ll also see how soil structure, drainage and biological activity contribute to a considered assessment before design decisions are made.
Table of Contents
Assessing soil structure, drainage, and biological activity
A geotechnical soil report describes ground conditions relevant to building design, including soil behaviour and bearing characteristics. A land survey report maps the site’s boundaries, levels and physical features, giving designers a spatial record of the property.
For Australian projects, applicable building requirements depend on the jurisdiction and proposed design. Soil tests and surveys provide different types of technical evidence, and neither replaces requirements that apply to the building work.
A site survey report may show boundaries, contours or levels, existing structures, access points and visible site features. Its contents depend on its purpose, so read the scope alongside the proposed building footprint.
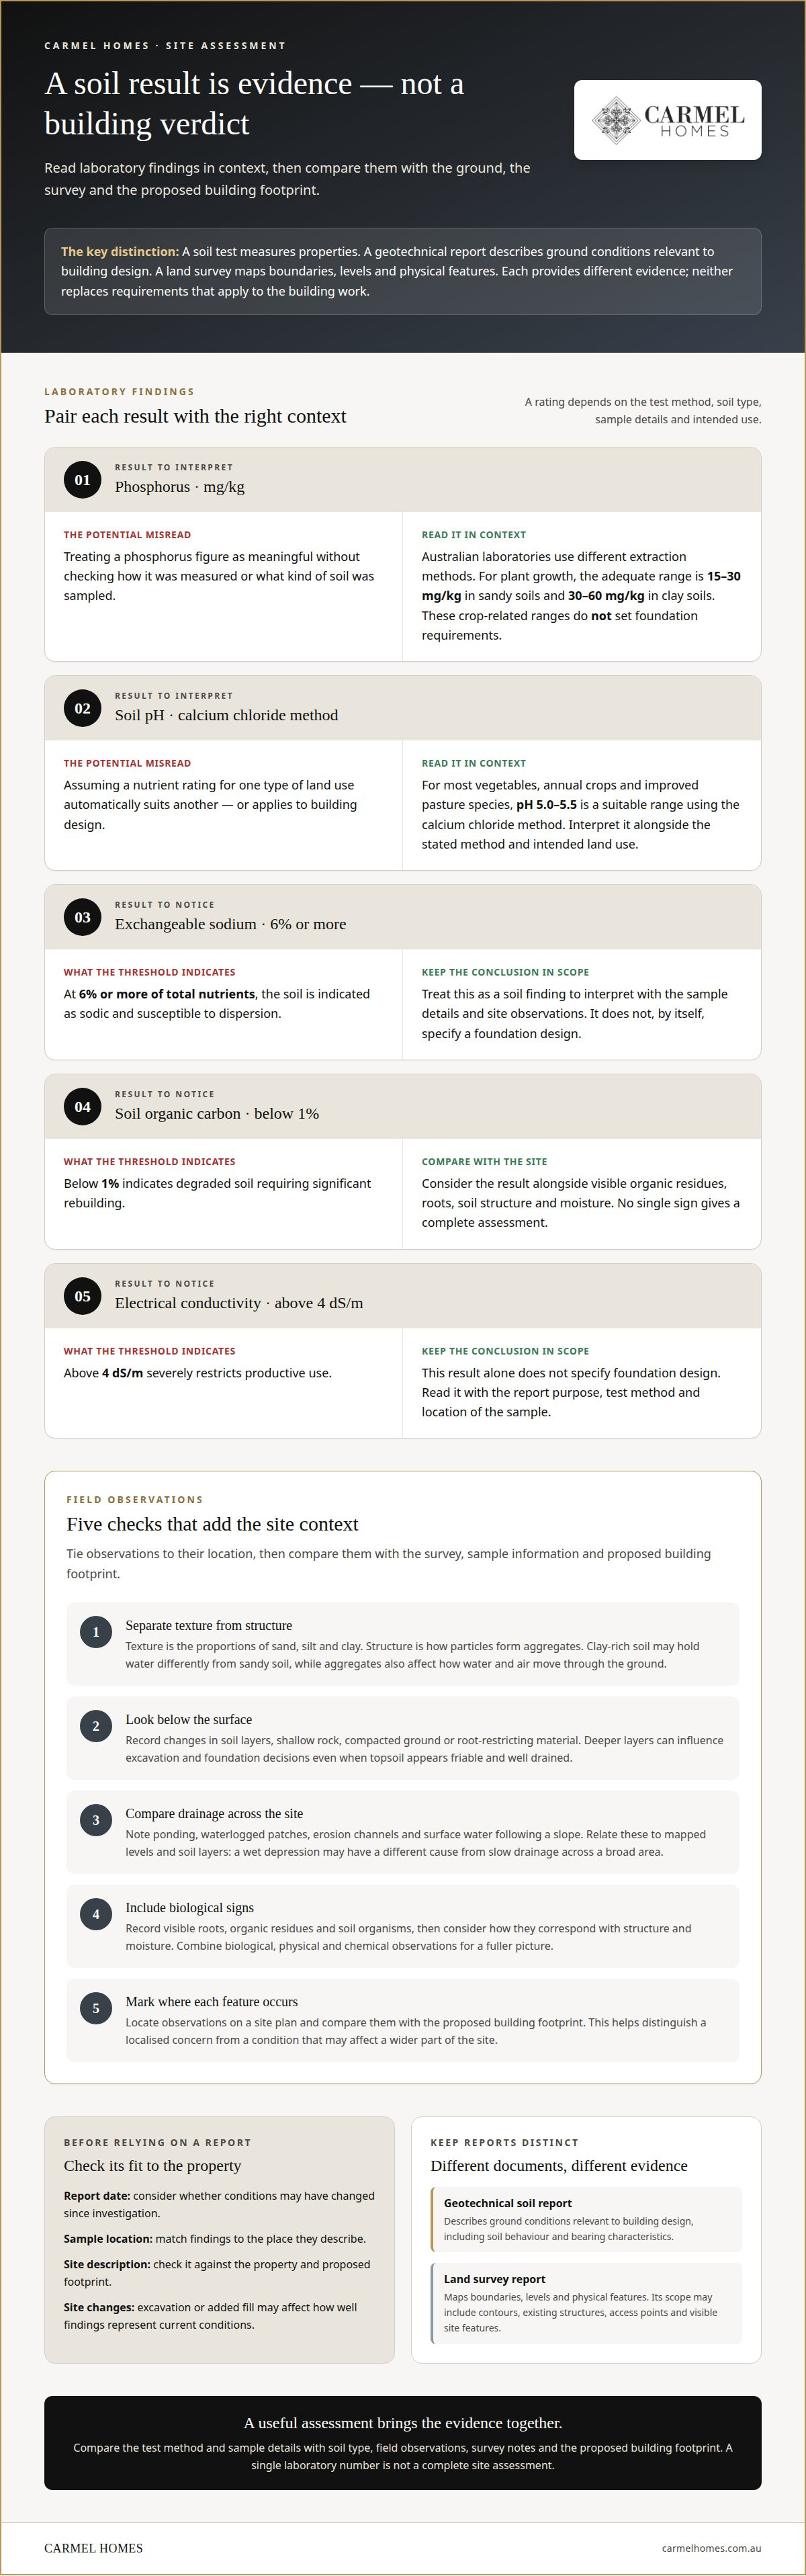
Examine texture and structure separately. Texture describes the proportions of sand, silt and clay, while structure describes how particles form aggregates. For example, clay-rich soil may hold water differently from sandy soil, but its aggregates also affect how water and air move through the ground.
Record effective depth, not just the surface appearance. Look for changes in soil layers, shallow rock, compacted ground or root-restricting material. A deeper layer can influence excavation and foundation decisions, even where the topsoil appears friable and well drained.
Compare drainage evidence across the site. Note ponding, waterlogged patches, erosion channels and areas where surface water follows a slope. Relate those observations to mapped levels and soil layers; a wet depression may have a different cause from slow drainage across a broad area.
Assess biological signs alongside physical indicators. Record visible roots, organic residues and soil organisms, then consider how these correspond with structure and moisture. No single sign gives a complete assessment; combining biological, physical and chemical observations creates a more useful picture of site conditions.
Keep observations tied to location. Mark where each feature occurs on a site plan, then compare it with the proposed building footprint. This helps distinguish a localised concern from a condition that may affect a wider part of the site.
What Does a Soil Test Really Tell You?
A soil test reports measured properties, not a complete building recommendation. For homeowners, understanding soil tests and site survey reports starts with separating laboratory findings from advice about a specific design.
Interpret test results and identify red flagsCompare each result with the laboratory’s test method, soil type and stated rating. Australian laboratories use different phosphorus extraction methods, so the method affects interpretation. For sandy soils, 15-30 mg/kg is an adequate phosphorus range; clay soils need 30-60 mg/kg for adequate plant growth. These crop-related ranges don’t set foundation requirements.
Check report currency and suitabilityCheck the report date, sample location and site description against the property and proposed building footprint. To understand soil tests and site survey reports, first confirm that each document covers the right ground and purpose. Consider whether changes since the investigation, such as excavation or added fill, could affect how well the findings represent current conditions.
Read nutrient ratings for the land use they describe. A rating for improved pasture does not automatically suit vegetables or another crop. For most vegetables, annual crops and improved pasture species, pH 5.0-5.5 using the calcium chloride method is a suitable range. Interpret that value alongside the stated method and intended use.
Note results that need careful interpretation. Exchangeable sodium at 6% or more of total nutrients indicates sodic soil susceptible to dispersion. Soil organic carbon below 1% indicates degraded soil requiring significant rebuilding. Electrical conductivity above 4 dS/m severely restricts productive use, but none of these results alone specifies foundation design.
Keep laboratory conclusions within their scope. A crop nutrient rating describes suitability for plant growth, while a building assessment considers conditions relevant to the proposed structure. Before applying a result to a design decision, read the test method, sample details and report purpose together.
Pairing laboratory results with field observations
For a house build, soil testing examines collected samples, while a site survey records property levels, boundaries and visible features. Report timing depends on site access, survey scope, laboratory workload and the analyses requested.
Review soil sampling and laboratory testingStart by matching laboratory results to sample locations and conditions recorded on site. These tests answer different questions, so check that the selected analyses relate to the issue being investigated.
Review the house-build testing processTrace how evidence moves from fieldwork into design. Soil samples are collected for laboratory analysis, while a survey records site dimensions and levels. Together, the reports help describe ground conditions and the property’s layout. Check that sample areas and survey coverage relate to the proposed building footprint, rather than assuming one report can replace the other.
Compare results with observations from the same locations. If laboratory findings indicate a soil concern, look for corresponding changes in surface condition, vegetation, moisture or ground level. For example, a damp patch beside a slope may call for a different interpretation from a result taken from a dry, level area. Record where observations agree or differ, since location gives each result context.
Distinguish site conditions before drawing conclusions. A single property can include a filled area, an exposed cutting and naturally occurring ground, each with distinct characteristics. Review the sampling plan and survey notes for these transitions, then establish whether results represent the proposed build area. If findings conflict, note the precise location and condition rather than averaging observations from unlike areas.
Bring the evidence together in a clear sequence: sample location, laboratory result, observed condition and relevance to the design. This makes it easier to see whether a result reflects a local feature or a broader site pattern. For example, consider a result near a drainage path alongside mapped levels and visible water movement, not in isolation.
Collecting and combining soil subsamples
Define one uniform sampling area before collecting soil. Keep ground with different land use, slope, drainage or visible fill separate, because a combined sample can conceal important differences. Each sample should represent the specific area it is intended to describe, rather than the whole property by default.
For one uniform area, combine subsamples from at least 12 locations. This helps limit the influence of an unusual patch, such as a compacted track or a spot enriched by organic material. Keep collection points within the same defined area.
Match sampling depth to the land use and testing purpose. For pasture or surface-cultivation areas, collect soil to a depth of 10 cm. Use a consistent depth across each sample area, so the combined material represents a comparable soil layer.
Keep the collection method consistent at every point. Changing depth can alter the mix of soil layers in a combined sample, making results harder to interpret. Follow the sampling instructions for the specific laboratory analysis, including whether surface litter should be excluded.
Separate visibly different conditions. If one part is sandy and another clay-rich, or one area is waterlogged, collect distinct samples. Combining unlike ground can mask variations that matter when interpreting the site.
Combine only subsamples from the same area and depth. Mix them thoroughly in a clean container, then prepare the laboratory sample according to the requested test instructions. Keep samples from separate areas apart and clearly identified.
Record each sample’s location, depth, land use and collection date. Mark locations on a site plan, especially where samples relate to the proposed building footprint. These details help connect laboratory results to the part of the property they represent.
Use representative sampling as one part of informed design planning. If you are considering a home that responds to your property’s specific characteristics, discuss a custom design and build.
Carmel Homes
Carmel Homes brings site considerations into the wider conversation about designing and building a home. Once soil test findings and survey details are understood, they can inform how a proposed design relates to the property, including its levels, layout and distinctive conditions.
This is a natural point to discuss a Custom Design and Build project, particularly when the intended home needs to respond to its setting rather than follow a standard plan. Carmel Homes guides the process from design through construction, with Full Service Project Management supporting the journey from concept to completion.
If you’re considering a home build and would like to discuss how your plans relate to your site, contact Carmel Homes.
Let site evidence inform your next design decision
Once you understand soil tests and site survey reports, bring the findings into the early design conversation. Site conditions can shape how a home sits on its land, so considered planning connects practical requirements with the character and priorities you want your home to express.
Carmel Homes offers custom home pathways, including Knockdown Rebuild and French Provincial Luxury Homes, with design choices shaped around each project. If you’re considering a new home, a site discussion can help frame the design journey and the decisions ahead.
Discuss your site with Carmel Homes, and take the next step towards a home thoughtfully composed for its setting.
Frequently Asked Questions
What information does a soil test report include in Australia?
A soil test report presents laboratory results for the submitted sample and identifies the tests performed. Depending on the analysis requested, it may report pH, phosphorus, exchangeable sodium, electrical conductivity or soil organic carbon. Check that the sample location and depth are clear. For example, a phosphorus result needs its extraction method and soil texture for meaningful interpretation, and a crop rating does not specify foundation requirements.
How much do soil tests and site surveys cost in Australia?
These are different scopes of laboratory work. Site survey pricing depends on the survey’s purpose, property size, access and level of detail required. A survey mapping boundaries and levels involves different work from one documenting additional site features.
How do soil report findings affect house foundations, slab design and construction costs?
Soil findings inform the ground assumptions used to develop foundation and slab design; they are not, by themselves, a construction specification. The proposed building and conditions across its footprint matter, so don’t treat a localised test result as representative of every part of the site.
What risks or warning signs should I look for in a soil or site survey report?
Look for gaps that make findings difficult to apply to the planned build. A report identifying a different property, omitting sample locations or describing an area outside the proposed footprint may not address the relevant ground. Also note unexplained fill, abrupt changes between soil layers or survey levels that do not align with observed site conditions. These differences may mean the evidence needs closer interpretation.


